
The Complete Checklist for AI Team Headshots (So Nothing Goes Wrong)

This article is part of our Team & Company Headshots collection.
Rolling out AI headshots to a team is simple in concept but easy to mess up in execution. Not because the technology is complicated — but because people don't plan for the human parts: getting everyone to actually submit photos, making sure the style is consistent, catching quality issues before photos go live, and keeping everything organized as the team grows.
This checklist covers every step from "we've decided to do AI headshots" to "everyone has a matching, professional photo on the team page." Use it as a reference whether you're doing this for 10 people or 500.
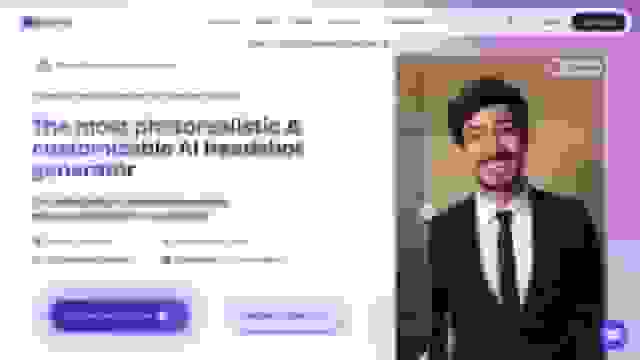
BetterPic AI Headshot Generator Review
Phase 1: Planning and team communication
Get aligned before anyone uploads a single photo
This is the step most teams skip — and it's why their team page ends up looking like a patchwork quilt of different styles and quality levels.
What to decide before launch:
- Where will these headshots be used? LinkedIn, company website, internal directory, email signatures, press kits? The answer affects style decisions.
- Who owns this project? Assign one person (usually HR, marketing, or office ops) to manage the rollout. Without a single owner, things slip through the cracks.
- What's the timeline? Give the team 2-3 weeks to submit photos. Less than that and you'll be chasing stragglers. More than that and momentum dies.
- What's the budget? AI headshots run $13-49/person depending on team size. Budget for the full headcount, not just "whoever gets around to it."
Communicate clearly (and only once)
Send one clear message to the team that covers:
- Why you're doing this (consistent team page, professional brand, etc.)
- What they need to do (upload X photos by Y date)
- How long it takes them (10-15 minutes total)
- Where to go for help (name one person)
The biggest adoption killer is confusing communication. One email, one set of instructions, one deadline. That's it. Don't send five updates with slightly different information.
Handle resistance proactively. Some people will be uncomfortable with AI-generated photos. Give them the option to submit a traditional photo that meets your style guidelines. In practice, less than 5% take this option — but having it available reduces pushback dramatically.
Phase 2: Photo submission requirements
What to tell your team about source photos
The quality of the AI output depends entirely on the quality of the source photos. This is the single most important step in the entire process.
Send this to your team (or something very close to it):
"We need 12-20 clear photos of your face. Here's how to get good ones:
- Face a window for good natural light
- Different angles: straight on, slight left, slight right
- Different expressions: smile, neutral, natural
- Shoulders visible, clean background
- No sunglasses, hats, or heavy filters
- Phone camera is fine — just make sure the lens is clean"
The specific requirements:
- 12-20 images per person — more variety = better AI output
- Head and shoulders framing — face should fill about 75% of the frame
- Different days/outfits if possible — photos from one sitting tend to look too similar
- High resolution and in focus — smartphone cameras work great if the lens is clean
- Glasses consistency — if someone wears glasses daily, ALL photos should have glasses. If they want the headshot without, ALL photos should be without. Mixing confuses the AI.
What to reject:
- Group photos (even cropped)
- Heavy filters or beauty mode
- Selfies from the exact same angle/session
- Blurry or low-resolution images
- Photos with hats or sunglasses obscuring the face
Platforms like BetterPic include an AI upload assistant that flags bad photos before processing — so people can fix issues upfront instead of getting mediocre results.
Phase 3: Style and brand decisions
Lock in the look before generating anything
This is where "everyone picks their own style" goes wrong. If 30 people each choose different backgrounds and lighting, your team page will look like a collage from 30 different photo studios.
One admin makes these decisions for everyone:
- Background — Pick ONE. Solid color (specify exact hex code), soft-focus office, or branded backdrop. Apply to the entire team.
- Lighting style — Warm and approachable? Cool and corporate? Bright and modern? Pick one direction.
- Clothing formality — Send a simple guideline: "Business professional," "Smart casual," or "Casual professional." Match it to your company culture.
- Framing — Head and shoulders? Slightly wider? Consistent crop across everyone.
Match the style to your brand
Think about what your company actually feels like:
- Law firm or financial services? Classic: neutral gray background, formal attire, confident expression.
- Tech startup? Modern: clean gradient or office background, smart casual, relaxed energy.
- Creative agency? Bold: textured or colored backgrounds, expressive, personality-forward.
- Healthcare? Warm: light backgrounds, professional but approachable, genuine smile.
"Consistency is important. You want to have consistent color balance, consistent backgrounds, and consistent composition." — Aaron Lucy, Photographer
BetterPic offers 150+ styles and lets you save brand presets — pick the look once and apply it to everyone. The team dashboard ensures nobody goes off-script.
Phase 4: Generation and quality control
Run a pilot batch first
Before processing the entire team, generate headshots for 3-5 people and review them carefully. This catches issues with your style settings before they're applied to 50+ people.
What to check in the pilot:
- Do the headshots look like the actual people?
- Is the background consistent across all photos?
- Are skin tones accurate and natural?
- Is the lighting even across different people?
- Do the photos look good side by side (the "team page test")?
If the pilot looks good, roll out to the full team.
Quality control checklist for every headshot
Once the full batch generates, review every photo before publishing. Yes, every photo.
Technical quality:
- Resolution is high enough for all intended uses (4K covers everything)
- Colors are accurate — skin tones look natural, not orange or gray
- No visible AI artifacts — weird hair edges, extra fingers, warped backgrounds, unnatural shadows
Likeness and authenticity:
- The person is recognizable — it looks like them, not a slightly different person
- Facial features match reality — the AI hasn't subtly changed jawline, eyes, or proportions
- Expression looks natural — not frozen, not overly smoothed, not uncanny
- Glasses, facial hair, and other personal features are rendered correctly
Brand consistency:
- Background matches the approved style
- Lighting is consistent across the batch
- Clothing formality matches guidelines
- Framing and crop are uniform
Bias check:
- Quality is equally good across all skin tones and demographics
- The AI hasn't inadvertently altered anyone's apparent age or ethnicity
- Compare generated headshots to source photos for accuracy
Handle revisions quickly
When something isn't right (and a few photos will need adjustment), have a clear process:
- Specific feedback — "The shadow on the left side looks unnatural" beats "this looks off"
- Use human editing for fine-tuning — BetterPic's Expert and Team plans include unlimited human touch-ups for exactly this purpose
- Set a deadline for revisions — don't let the feedback loop drag on indefinitely
- Track issues for future batches — if the same problem keeps appearing, adjust your settings
Phase 5: File organization and distribution
Name files consistently
This sounds boring. It prevents chaos.
Use a standard format:
LastName_FirstName_Headshot_2025_v1.jpg
If you have departments:
Marketing_JohnSmith_Headshot_2025_v1.jpg
- Underscores or hyphens, never spaces
- Date in YYYY format for easy sorting
- Version number so you can track updates
- Document the naming convention and share it
Store everything centrally
- One shared folder for all final headshots (not scattered across email threads and Slack messages)
- Organize by department or team if needed
- Restrict editing access — only the project owner should modify files
- Use encrypted, secure storage for employee photos
- Schedule regular backups
Distribute to all the right places
Once headshots are approved, push them everywhere at the same time:
- Company website team page
- Internal directory / HRIS
- LinkedIn (provide each person their headshot with instructions to update)
- Email signature template
- Slack / Teams profile
- Conference and event bios
- Press kit
Don't do this piecemeal. A half-updated team page with some new headshots and some old ones looks worse than an entirely outdated one.
Phase 6: Ongoing maintenance
Build headshots into onboarding
The biggest mistake teams make: treating AI headshots as a one-time project instead of an ongoing process.
- Add headshots to the new hire onboarding checklist — right alongside "set up email" and "get laptop." Every new hire gets their matching headshot in week one.
- Keep the style preset saved — so new hires get the exact same background, lighting, and formality level as everyone else.
- Assign who handles this — someone in HR or ops should own the ongoing process, not just the initial rollout.
Schedule regular refreshes
- Annual review — look at all team headshots together once a year. Do they still match? Do any look outdated?
- Update triggers — new hairstyle, glasses, significant appearance change, role change, or rebrand should trigger an update
- Make updates easy — with AI tools, refreshing a headshot takes 10 minutes. There's no excuse for a photo from 2019 on your 2025 team page.
Document everything
- Style guidelines (background hex code, lighting style, clothing guidance, framing)
- File naming convention
- Storage location and access rules
- Process for new hires
- Process for updates and refreshes
- Contact person for questions
When the person who set this up leaves the company, the next person should be able to pick it up without guesswork.
What platform should you use?
For team headshots specifically, look for:
- Centralized team dashboard (not individual accounts for each person)
- Brand preset saving (lock in the style, apply to everyone)
- Batch processing (not one-at-a-time)
- Human editing (AI catches 90-95%, humans catch the rest)
- Enterprise security (SOC 2, ISO 27001, GDPR/CCPA)
- Commercial licensing (you need to own the photos)
- Under-1-hour turnaround
BetterPic checks all of these: team dashboard, 150+ styles with saveable presets, 4K output, unlimited human touch-ups on team plans, SOC 2 + ISO 27001 security, and results in under an hour. Pricing starts at $35/person for individuals, with team rates from $13-49/person depending on volume.
"If you upload good photos where your face is clearly visible then you will get good headshots where your face is clearly visible!" — BetterPic
What Teams Are Actually Seeing With AI Headshots
Real results from companies using BetterPic for team headshots:
BetterHealth Group — A healthcare organization with providers across 6 states used BetterPic's centralized dashboard to manage headshots across every location. "We needed a solution that was streamlined and easy for everyone. BetterPic made that possible." — Manali Shah, Social Media Manager (Read the case study)
By the numbers: 32M+ headshots delivered · 1,000+ companies · 150+ style options · 2-hour average turnaround · 99% satisfaction rate · 4.7/5 on Trustpilot (1,000+ reviews)
That really is the whole secret. Good planning, good source photos, consistent style, quality review, and a solid platform. Get those right and your team page goes from "random patchwork" to "this company has their act together" — in about a week.
Sources & References
- LinkedIn Profile Photo Tips — LinkedIn
- How Your Profile Photo Impacts Your LinkedIn Presence — LinkedIn Official Blog
- AI Image Generation Market Report — Grand View Research
- How AI Is Changing Photography — Forbes
- Professional Headshot Photography Pricing — Thumbtack

Written by
Hertok KawangCustomer Success Specialist
Hertok works directly with BetterPic customers every day, giving him first-hand insight into what professionals need from their headshots. With 6+ years in customer support, he writes from real user experience and common questions he encounters daily.
- 6+ years in customer success and support
- Handled 10,000+ customer headshot consultations
- Expert in AI headshot quality assessment
Related team and company headshots resources
Keep exploring this topic with focused resources from the B2B journey.
Primary destination:BetterPic Teams for company and employee headshots
Frequently Asked Questions
How can we customize AI headshots to align with our company's brand identity?
- How to Align AI-Generated Headshots with Your Brand Identity Creating AI-generated headshots that truly represent your company's brand starts with focusing on the visual elements that define your identity. Begin by choosing clothing styles and colors that align with your brand's color palette and overall vibe. This attention to detail not only reinforces your professionalism but also helps make a stronger connection with your audience. Next, think about the background. Opt for uniform backgrounds that enhance your company’s image and contribute to a polished, cohesive look. Lighting is another critical factor - consistent, high-quality lighting across all headshots ensures a professional finish and keeps the focus on the individual. The good news? AI tools make it easier than ever to customize these elements. By tailoring headshots to match your brand’s standards, you can create visuals that convey trust and credibility while staying true to your company’s identity.
What steps should I follow to create high-quality and consistent AI-generated headshots?
- How to Create Professional AI-Generated Headshots If you're aiming for polished, professional AI-generated headshots, here’s how to get the best results: Start with clear, varied photos: Upload 12–20 high-quality images where your face is clearly visible. Include a mix of angles, lighting, and expressions, but stick to what feels natural - your usual hairstyle and makeup should be reflected. Prioritize a professional look: Use photos with clean backgrounds and wear professional attire. Steer clear of blurry, cropped, or overly filtered images, as they can affect the quality of the final headshots. With the right preparation, you can ensure the AI generates headshots that are both polished and a true reflection of your professional image.
What are the benefits of using AI-generated headshots for remote or distributed teams?
- AI-generated headshots bring speed, convenience, and affordability to the table, making them a practical option for teams working remotely or across different locations. Unlike traditional photo shoots, there’s no need to juggle schedules or arrange in-person sessions, cutting down on time and logistical headaches. Using AI, teams can produce professional, polished images that maintain a consistent style and align with the company’s branding. This uniformity not only enhances the overall look but also boosts the company’s credibility and online presence. Plus, the process is incredibly fast - results are often ready in less than 30 minutes, perfect for situations where time is tight. In short, AI headshots simplify the creation of cohesive team visuals, offering a modern and efficient solution for today’s distributed teams.
Save 87%on average on your professional photos.
Whenever, wherever you are.
Get studio-quality, 4K images in a variety of outfits & settings in less than an hour.
Get your headshots nowStart now